
-
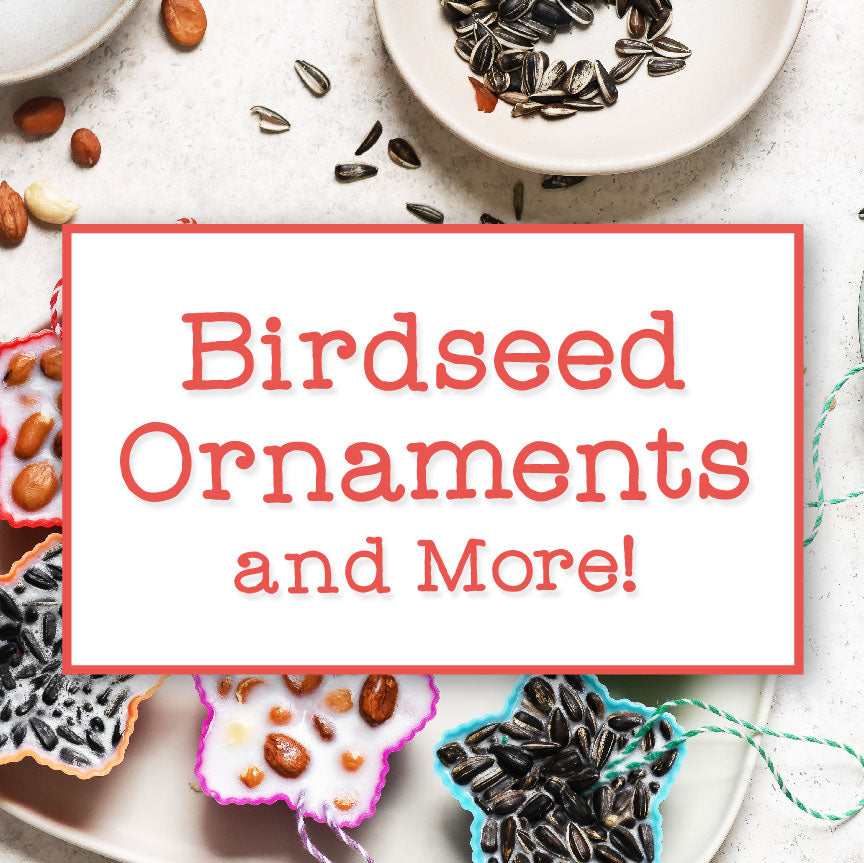
 Click Here for Free Download
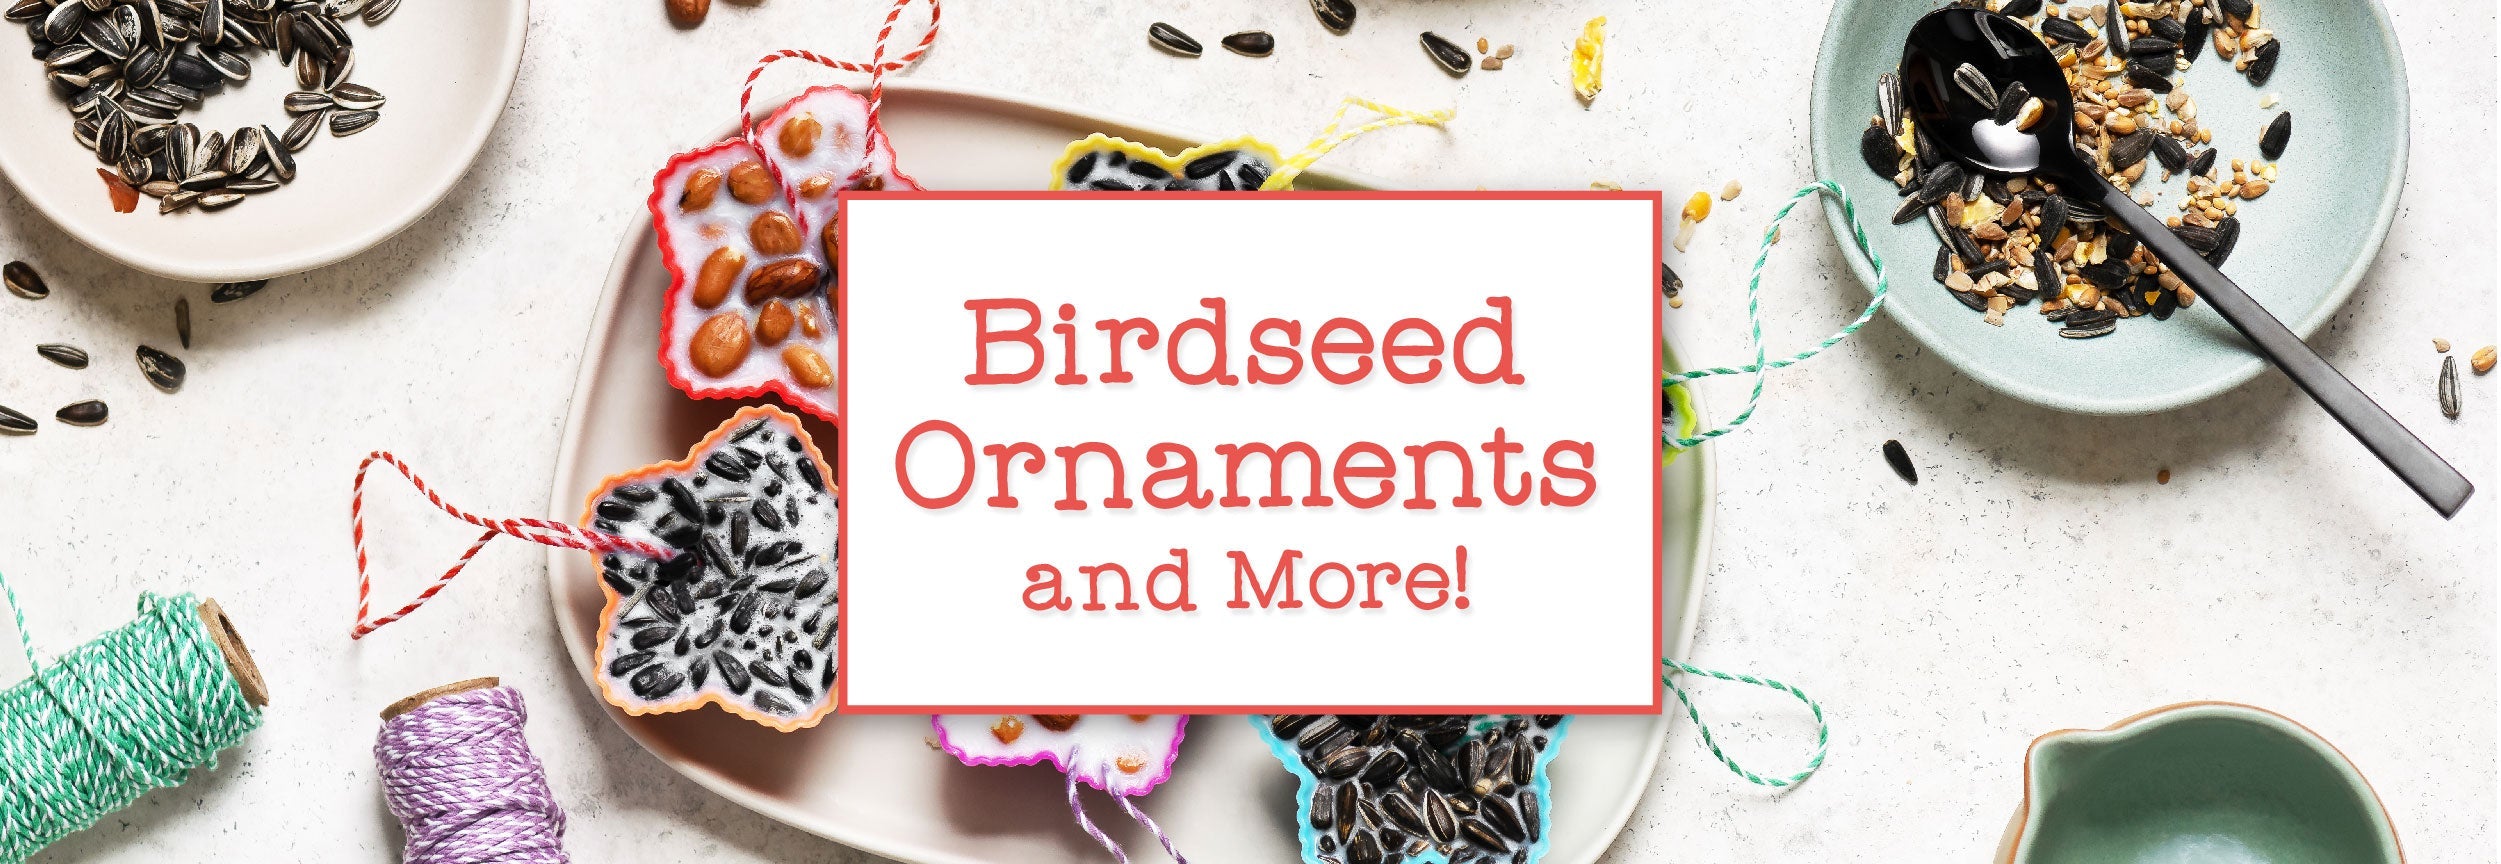
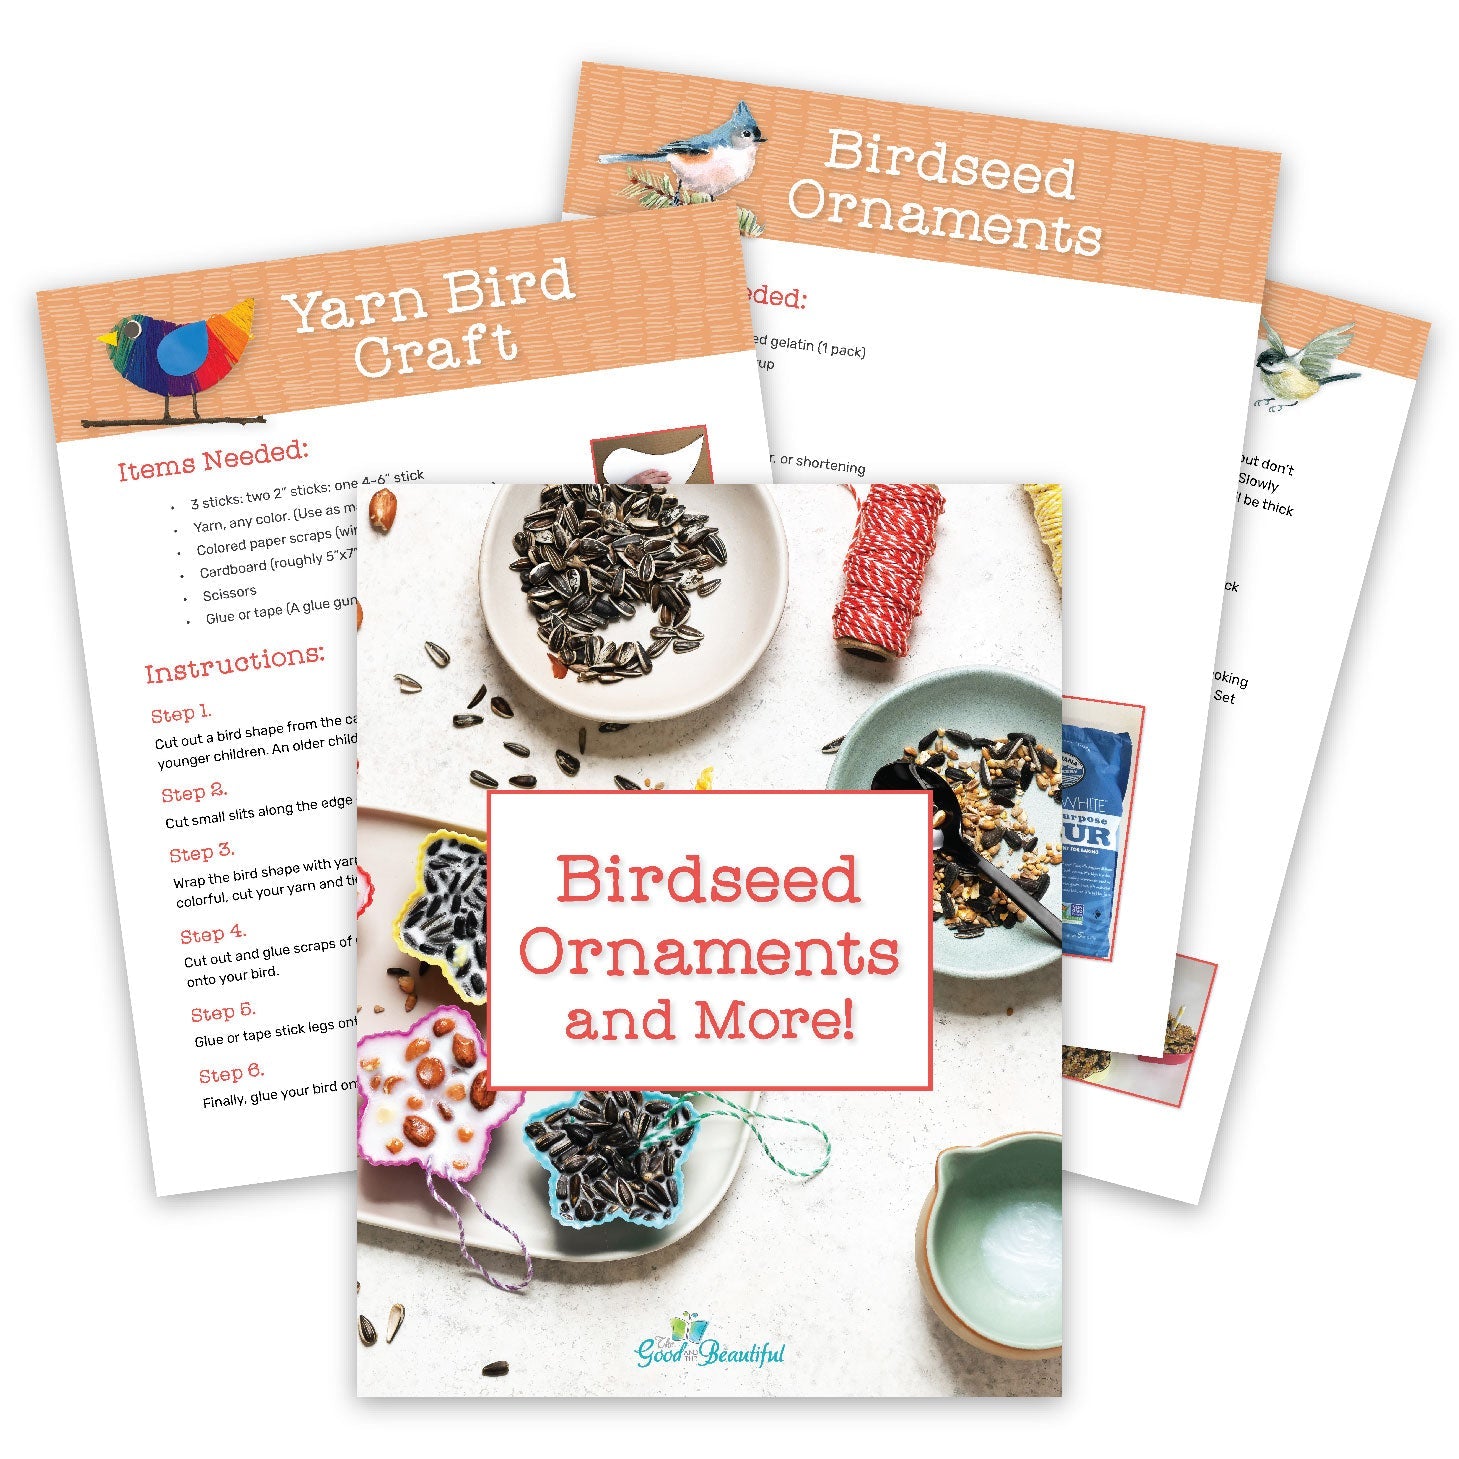
Download a free PDF printable with a birdseed ornament recipe that is found in our Creative Arts and Crafts book, as well as instructions to make a yarn bird craft!

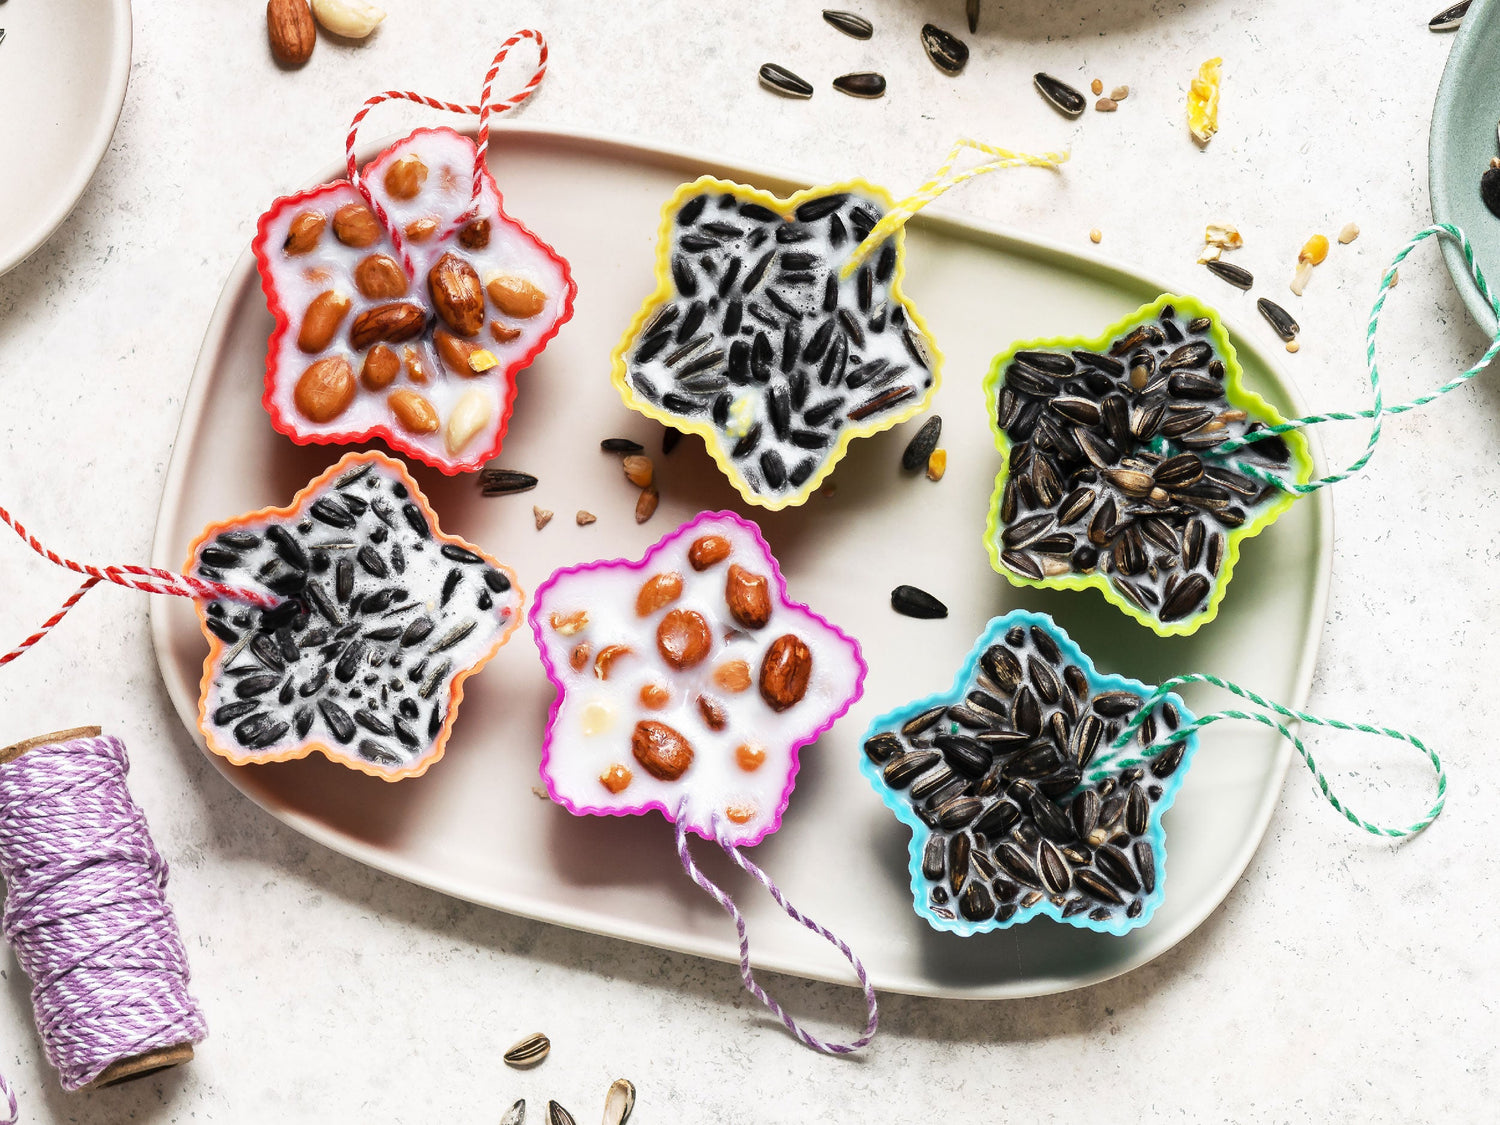
Birdseed Ornaments
Items needed to make approximately six birdseed ornaments:
- 1 ¼ tsp unflavored gelatin (1 pack)
- 1 ½ Tbsp corn syrup
- 2 cups birdseed
- ⅓ cup flour
- ¼ cup water
- Cooking spray, butter, or shortening
- Metal cookie cutters
- Parchment paper
- Twine or string, 9” for each ornament
- A 2″ piece of straw for each birdseed ornament
- A saucepan and a medium-sized bowl
- A spatula
Follow these eight simple steps:
STEP 1:
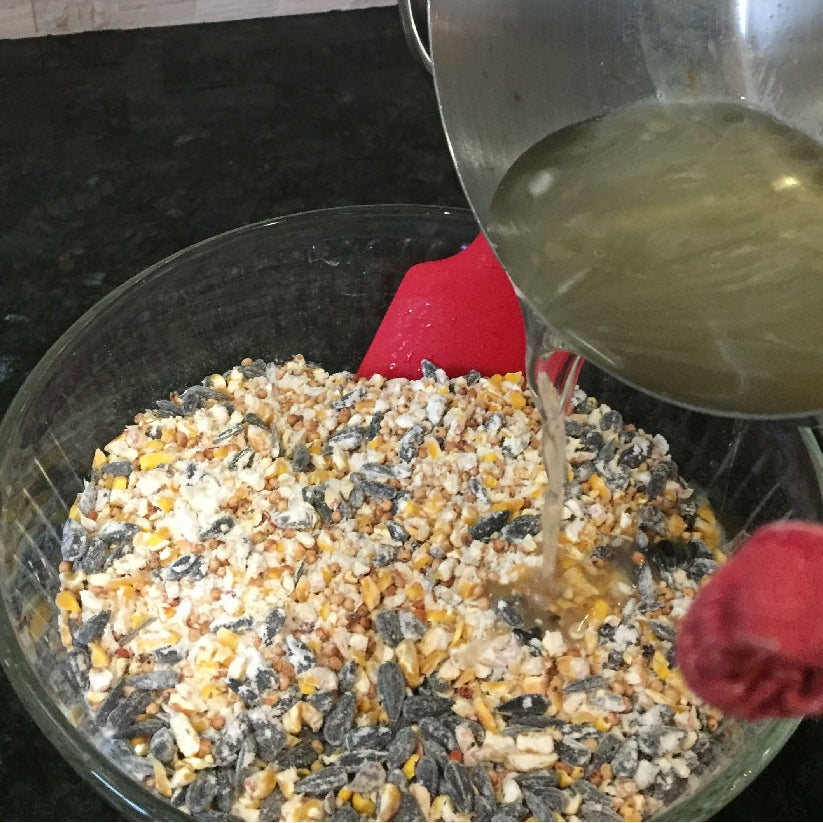
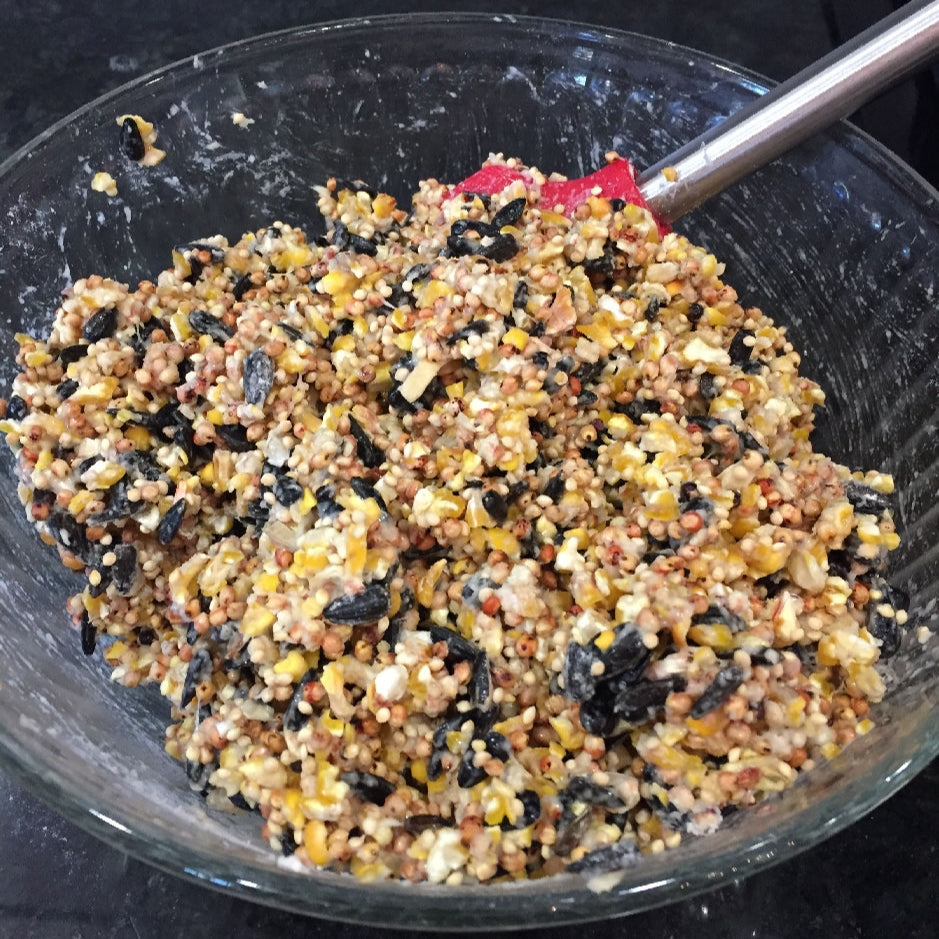
In a saucepan, heat the water, gelatin, and corn syrup. Dissolve the gelatin, but don’t let it boil. Pour the birdseed and flour into a separate bowl and mix together. Slowly add the gelatin mixture into the birdseed mixture and mix well. It will be thick and gooey.
STEP 2:
The mixture is sticky, so lay out parchment paper to work on a non-stick surface.
STEP 3:
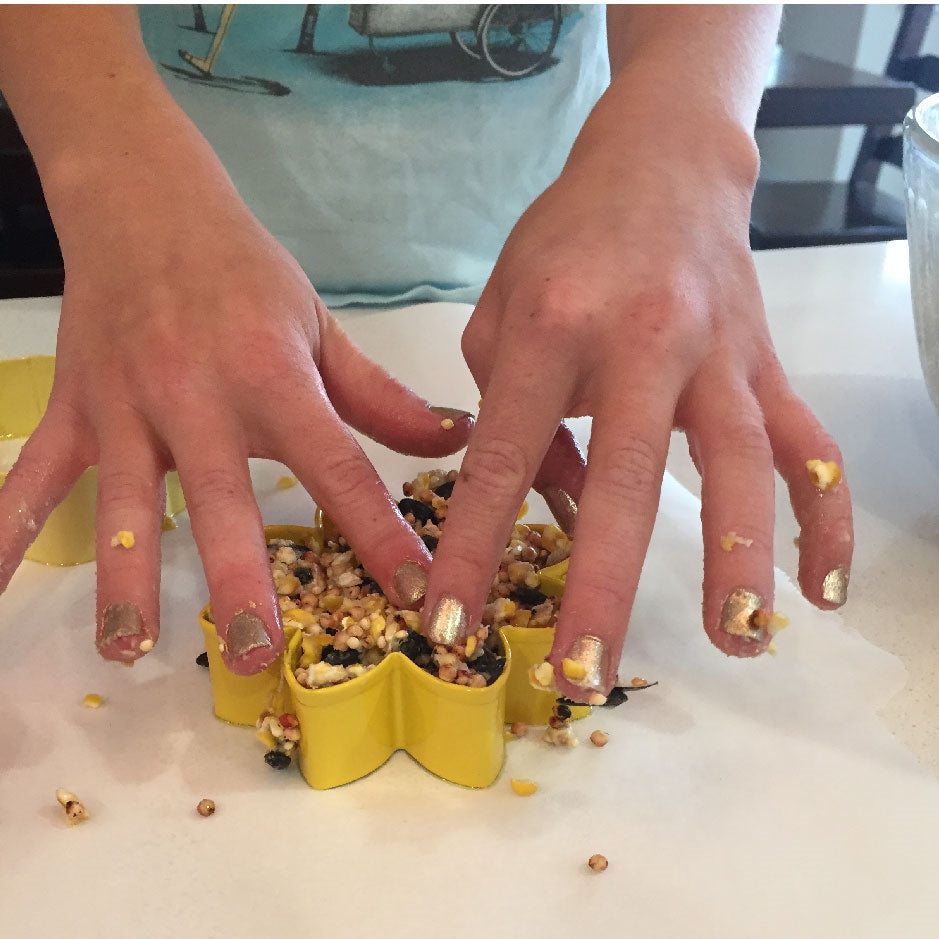
Grease cookie cutters. Spray or grease the interior of your cookie cutters with cooking spray, butter, or shortening so the ornaments come out easily when they are dry. Set the cutters on the parchment paper.
STEP 4:
Grease your hands to help the birdseed mixture resist sticking to your fingers. Press the mixture into all the corners of your cookie cutters.
STEP 5:
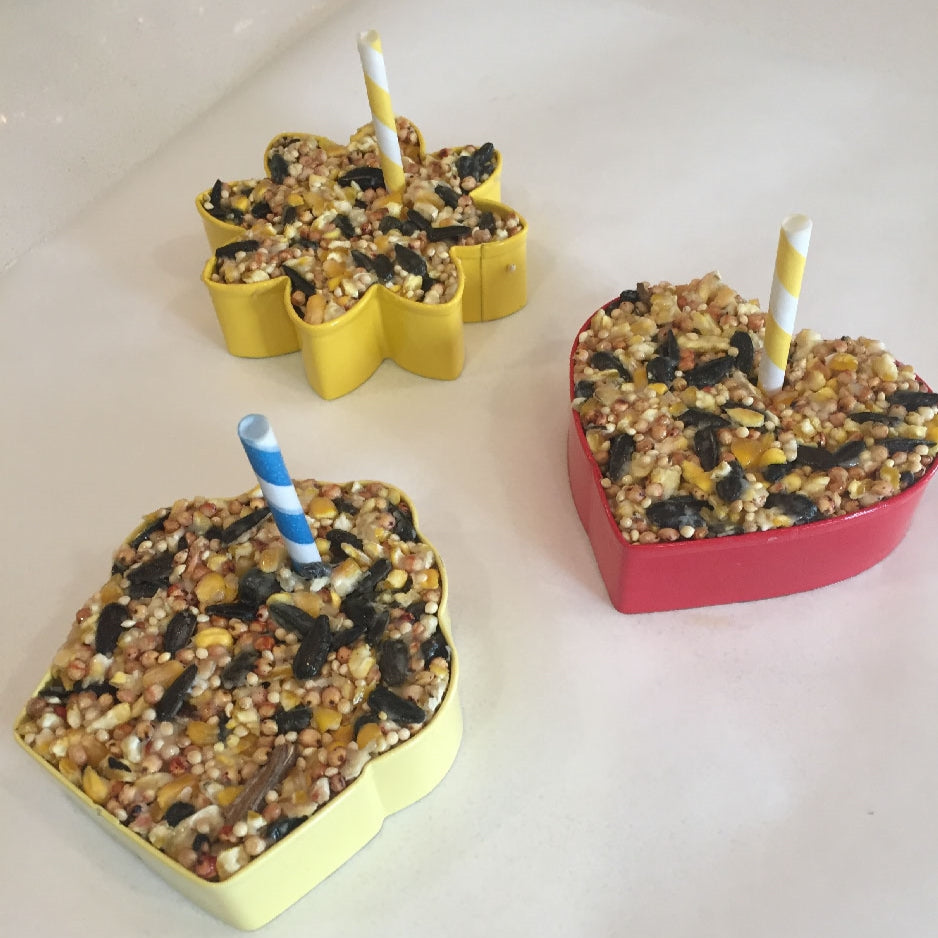
Push a greased straw into each ornament about ¼” away from the edge. This will create a hole so you can hang the ornament with string. Make sure to push the straw all the way down and leave it there.
STEP 6:
Let the birdseed ornaments dry for several hours with the straw in. Then remove the ornaments from the cookie cutters and pull out the straws.
STEP 7:
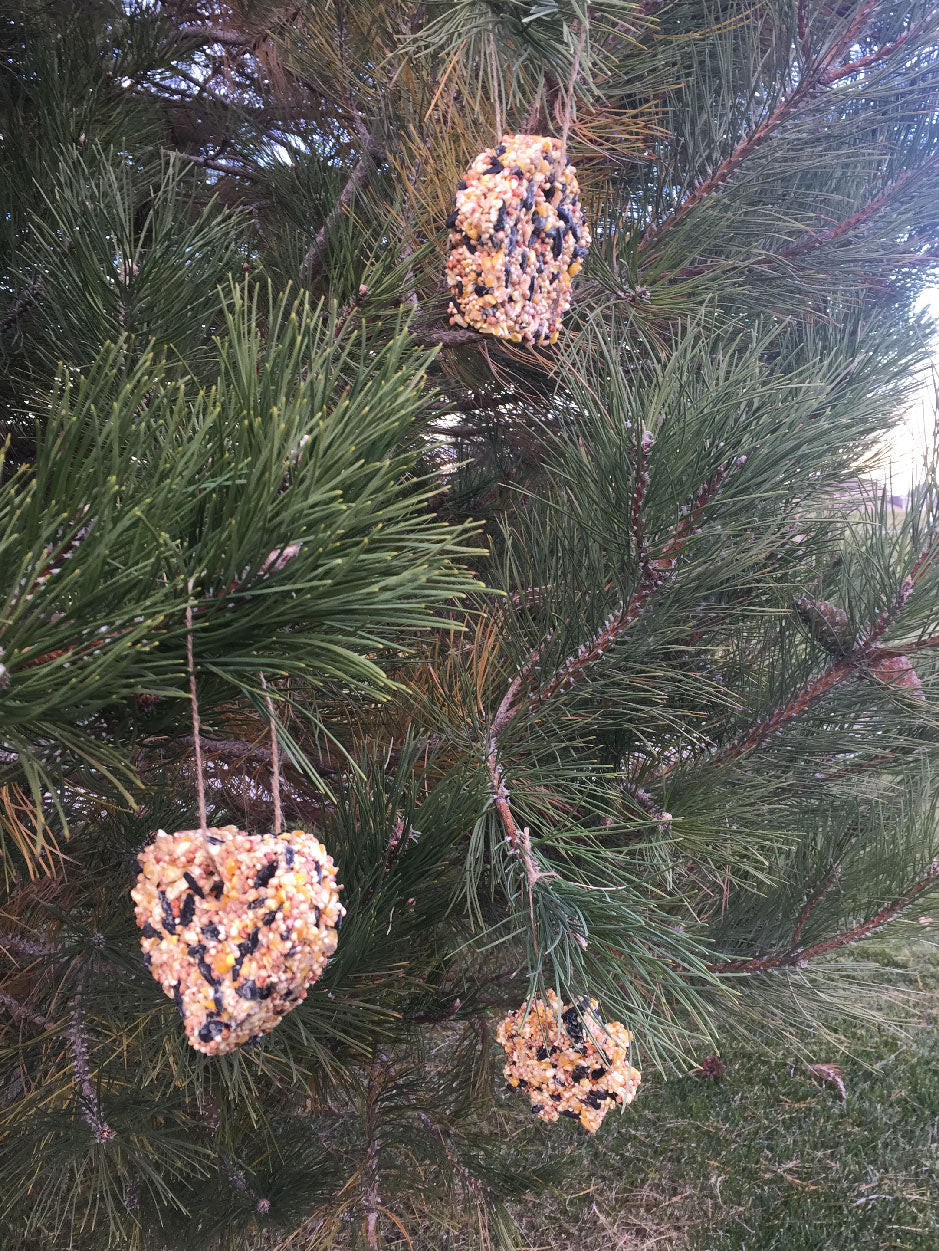
Cut a 9″ piece of twine or string. Thread it through the hole of the ornament and tie a knot at the top. Repeat for all ornaments.
STEP 8:
Find a tree to hang your ornaments on! Make sure you nestle the birdseed ornaments into the branches so the birds have a branch to stand on while they eat!
-
 Purchase Here
This blog post is part of our Science for Little Hearts and Hands Fields and Flowers course.
-
 Purchase Here
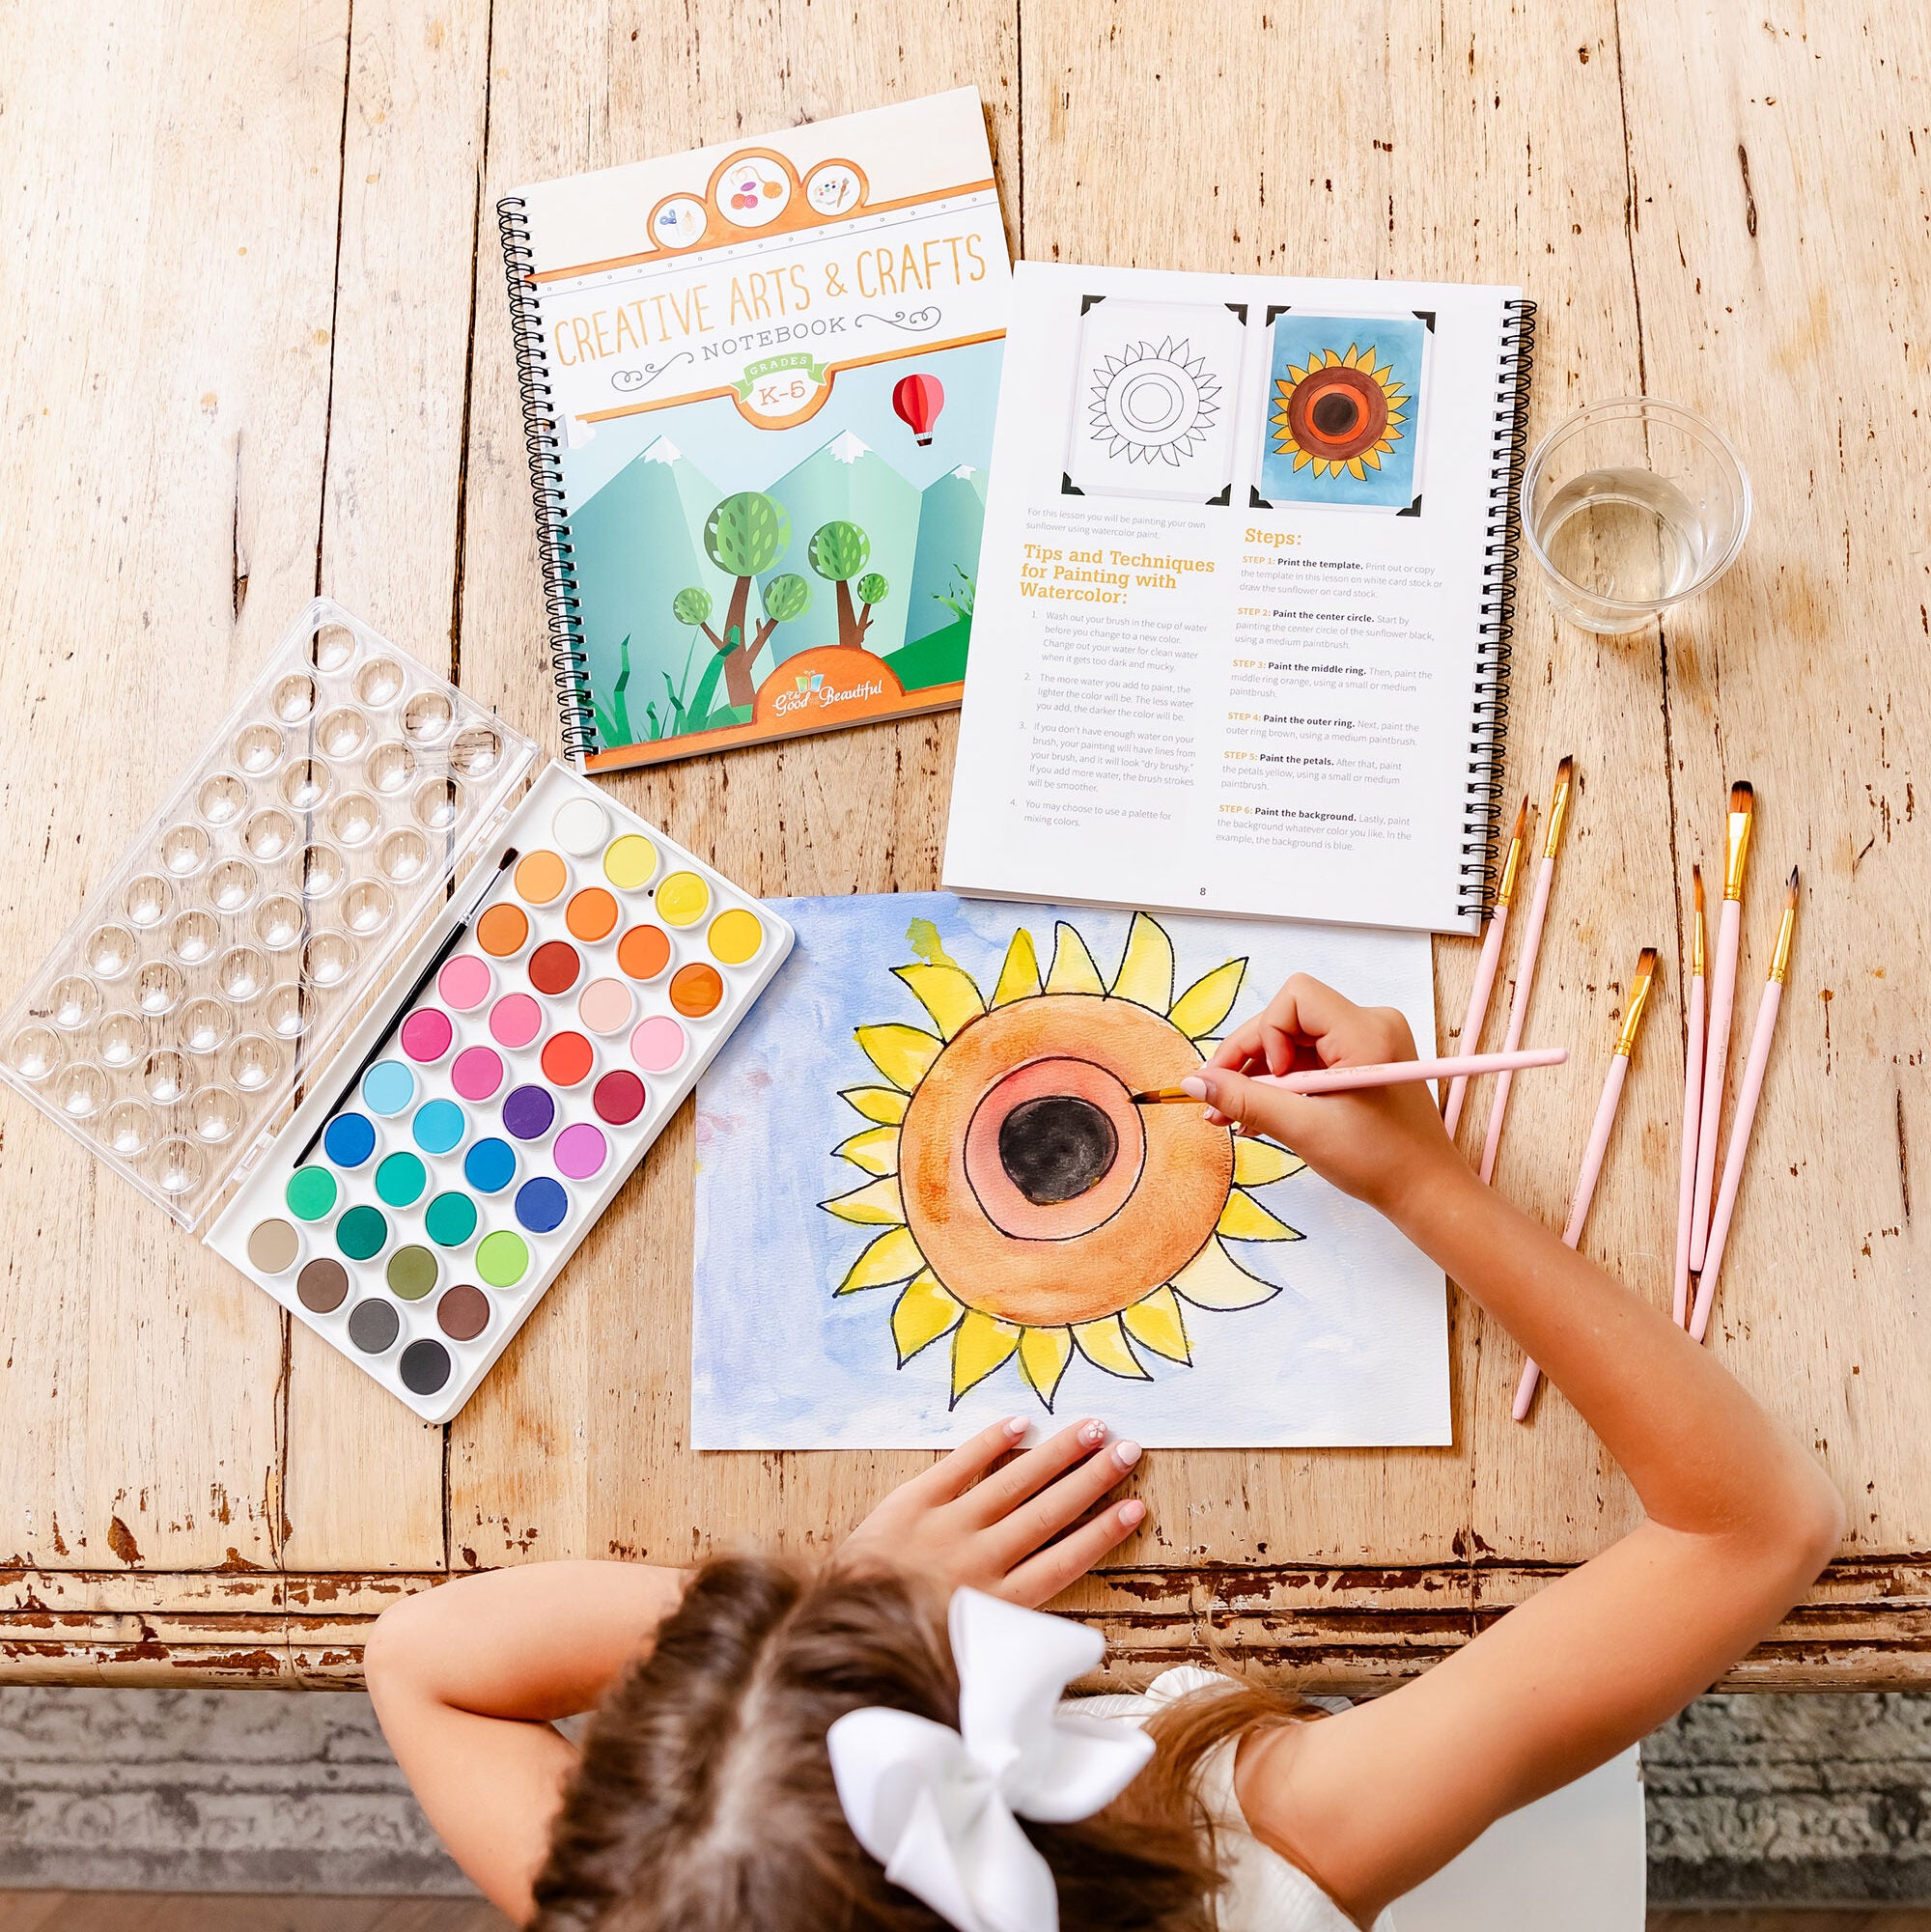
Find more arts and crafts for kids in our Creative Arts and Crafts book.
-
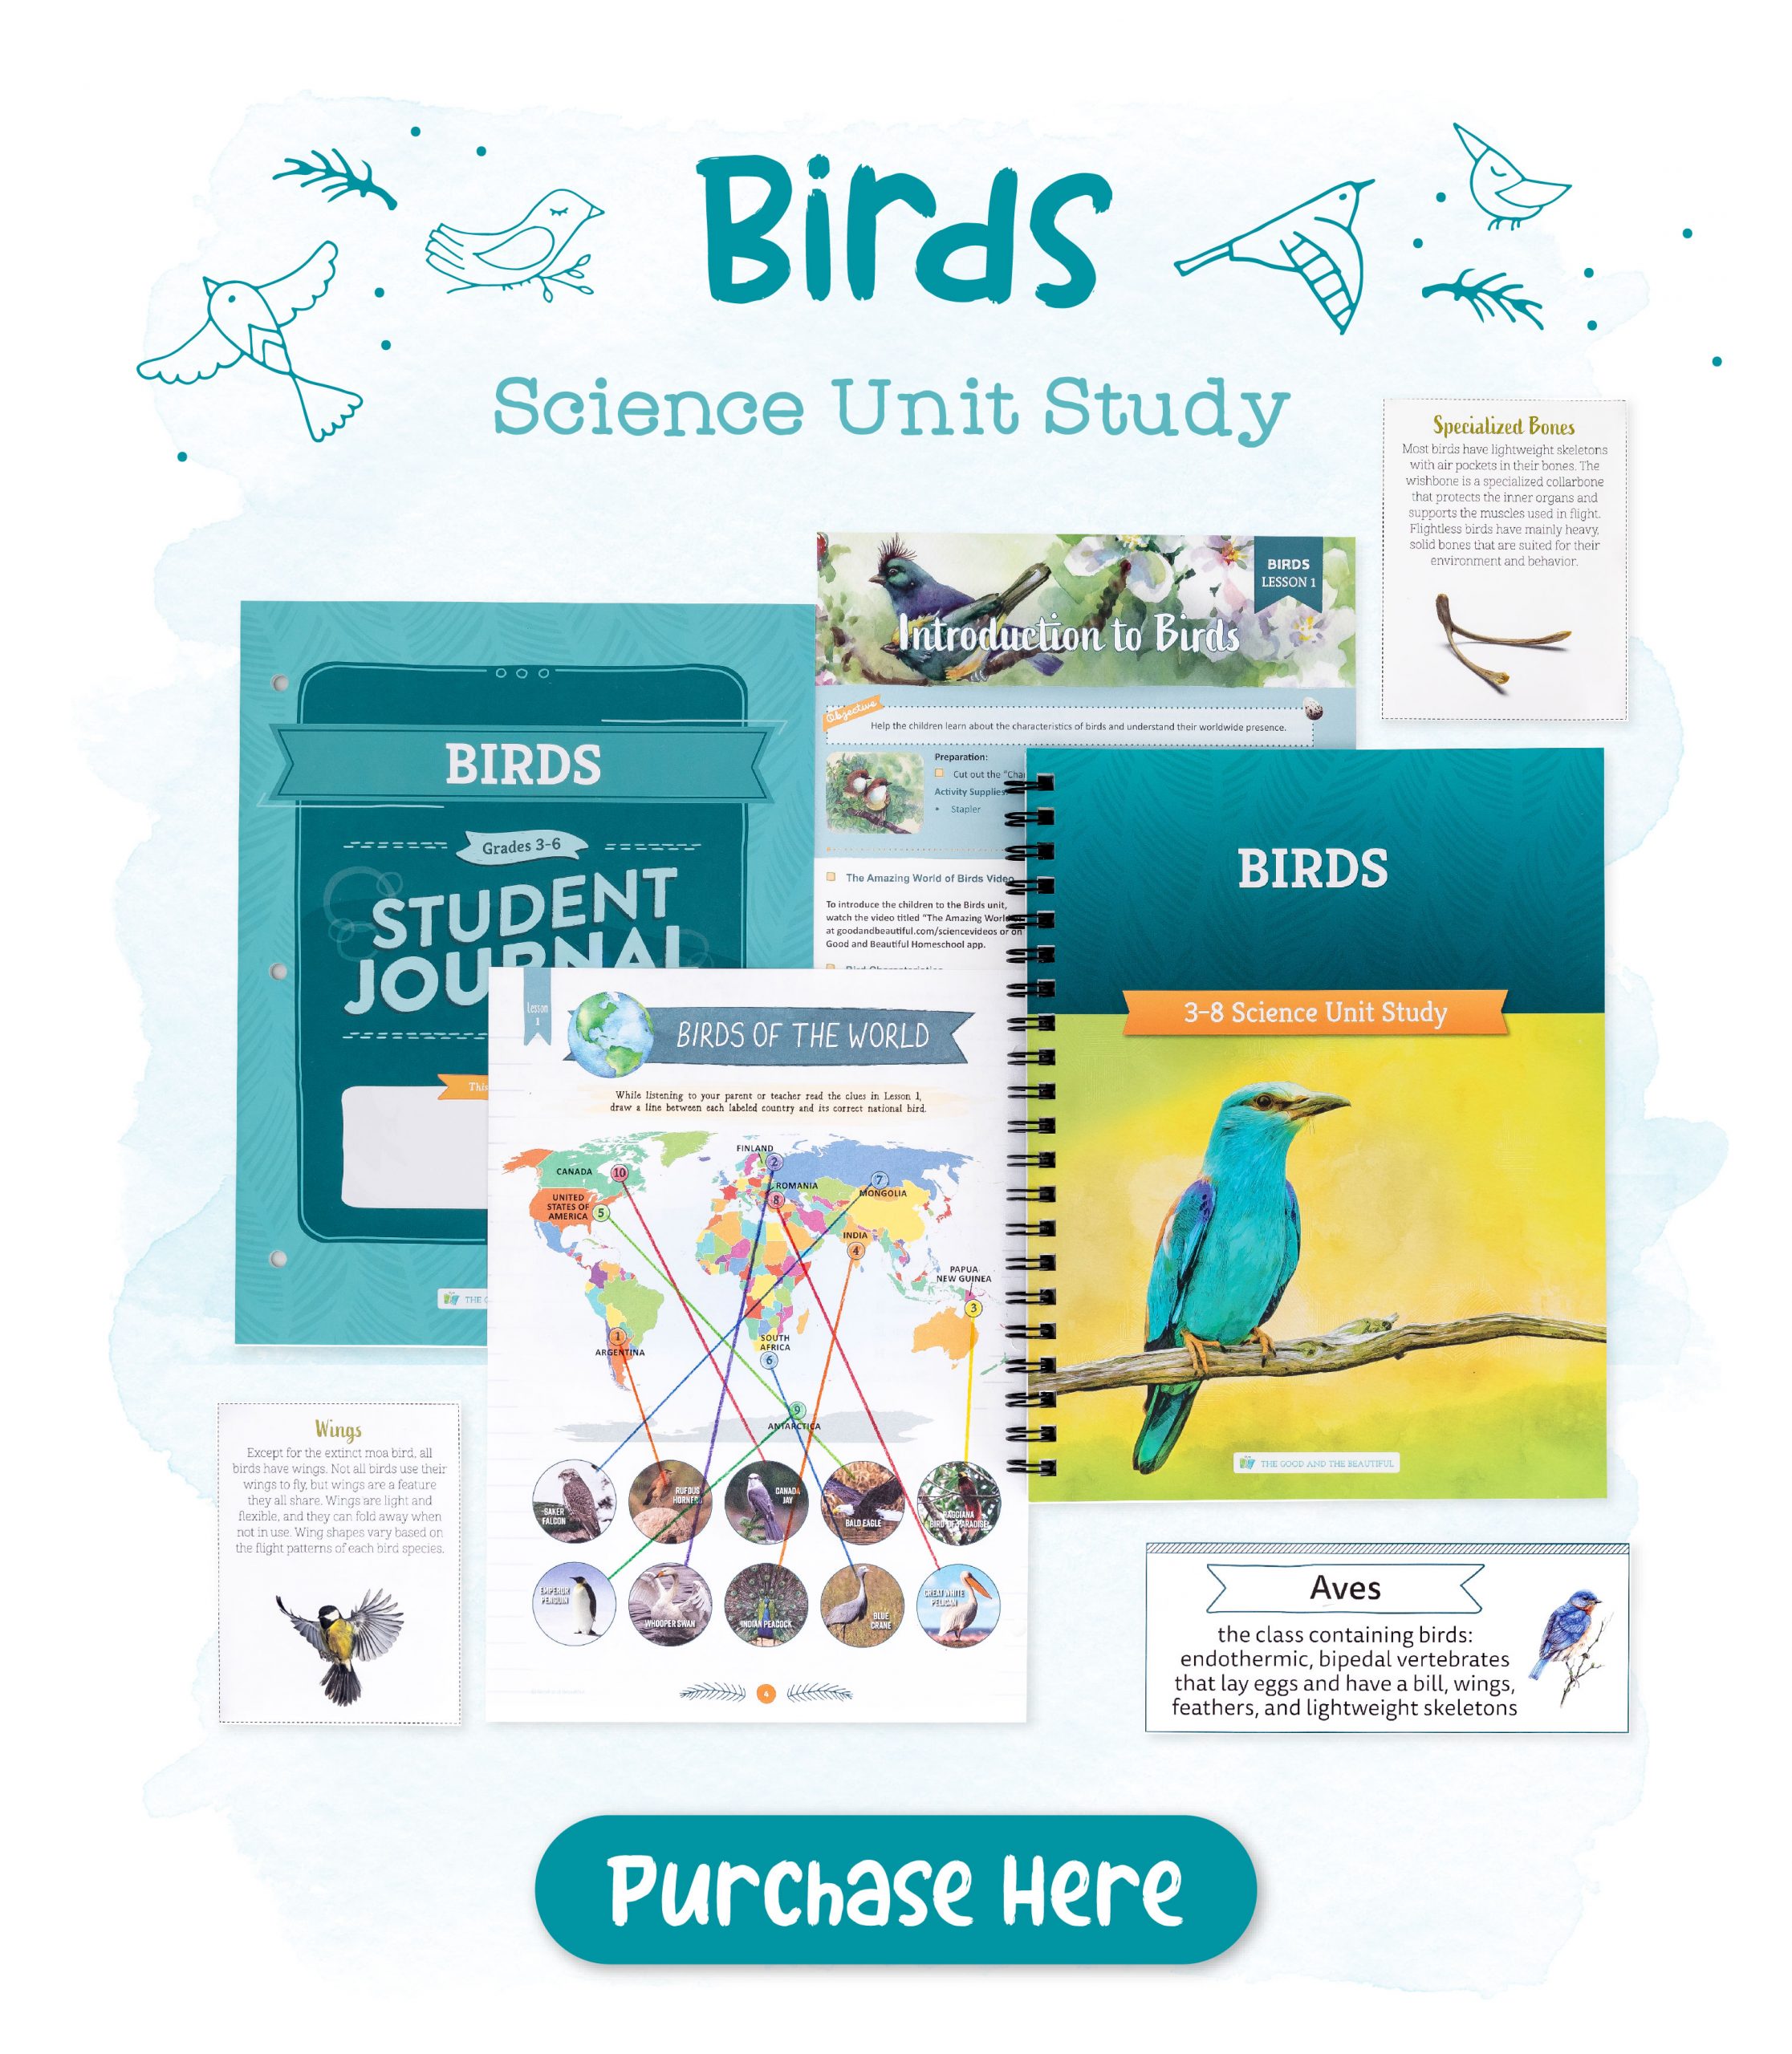
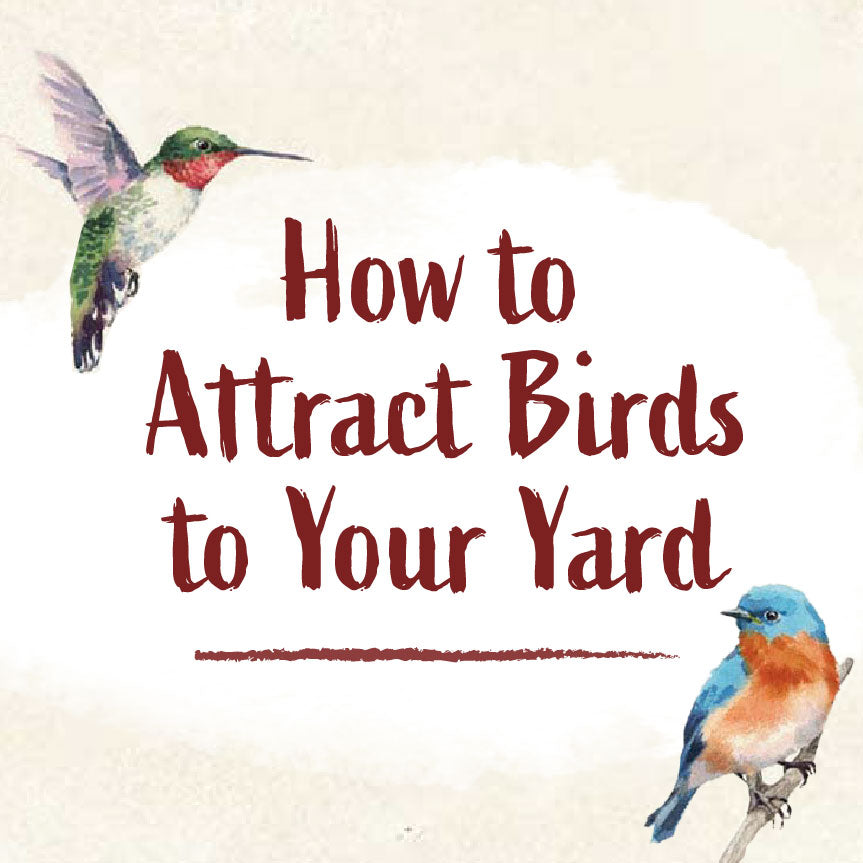
In the Birds homeschool science unit from The Good and the Beautiful, families delve into ornithology, the study of birds. The final lesson includes a Bird Bingo game that is beautiful, fun, and easy for children of all ages to play.
-
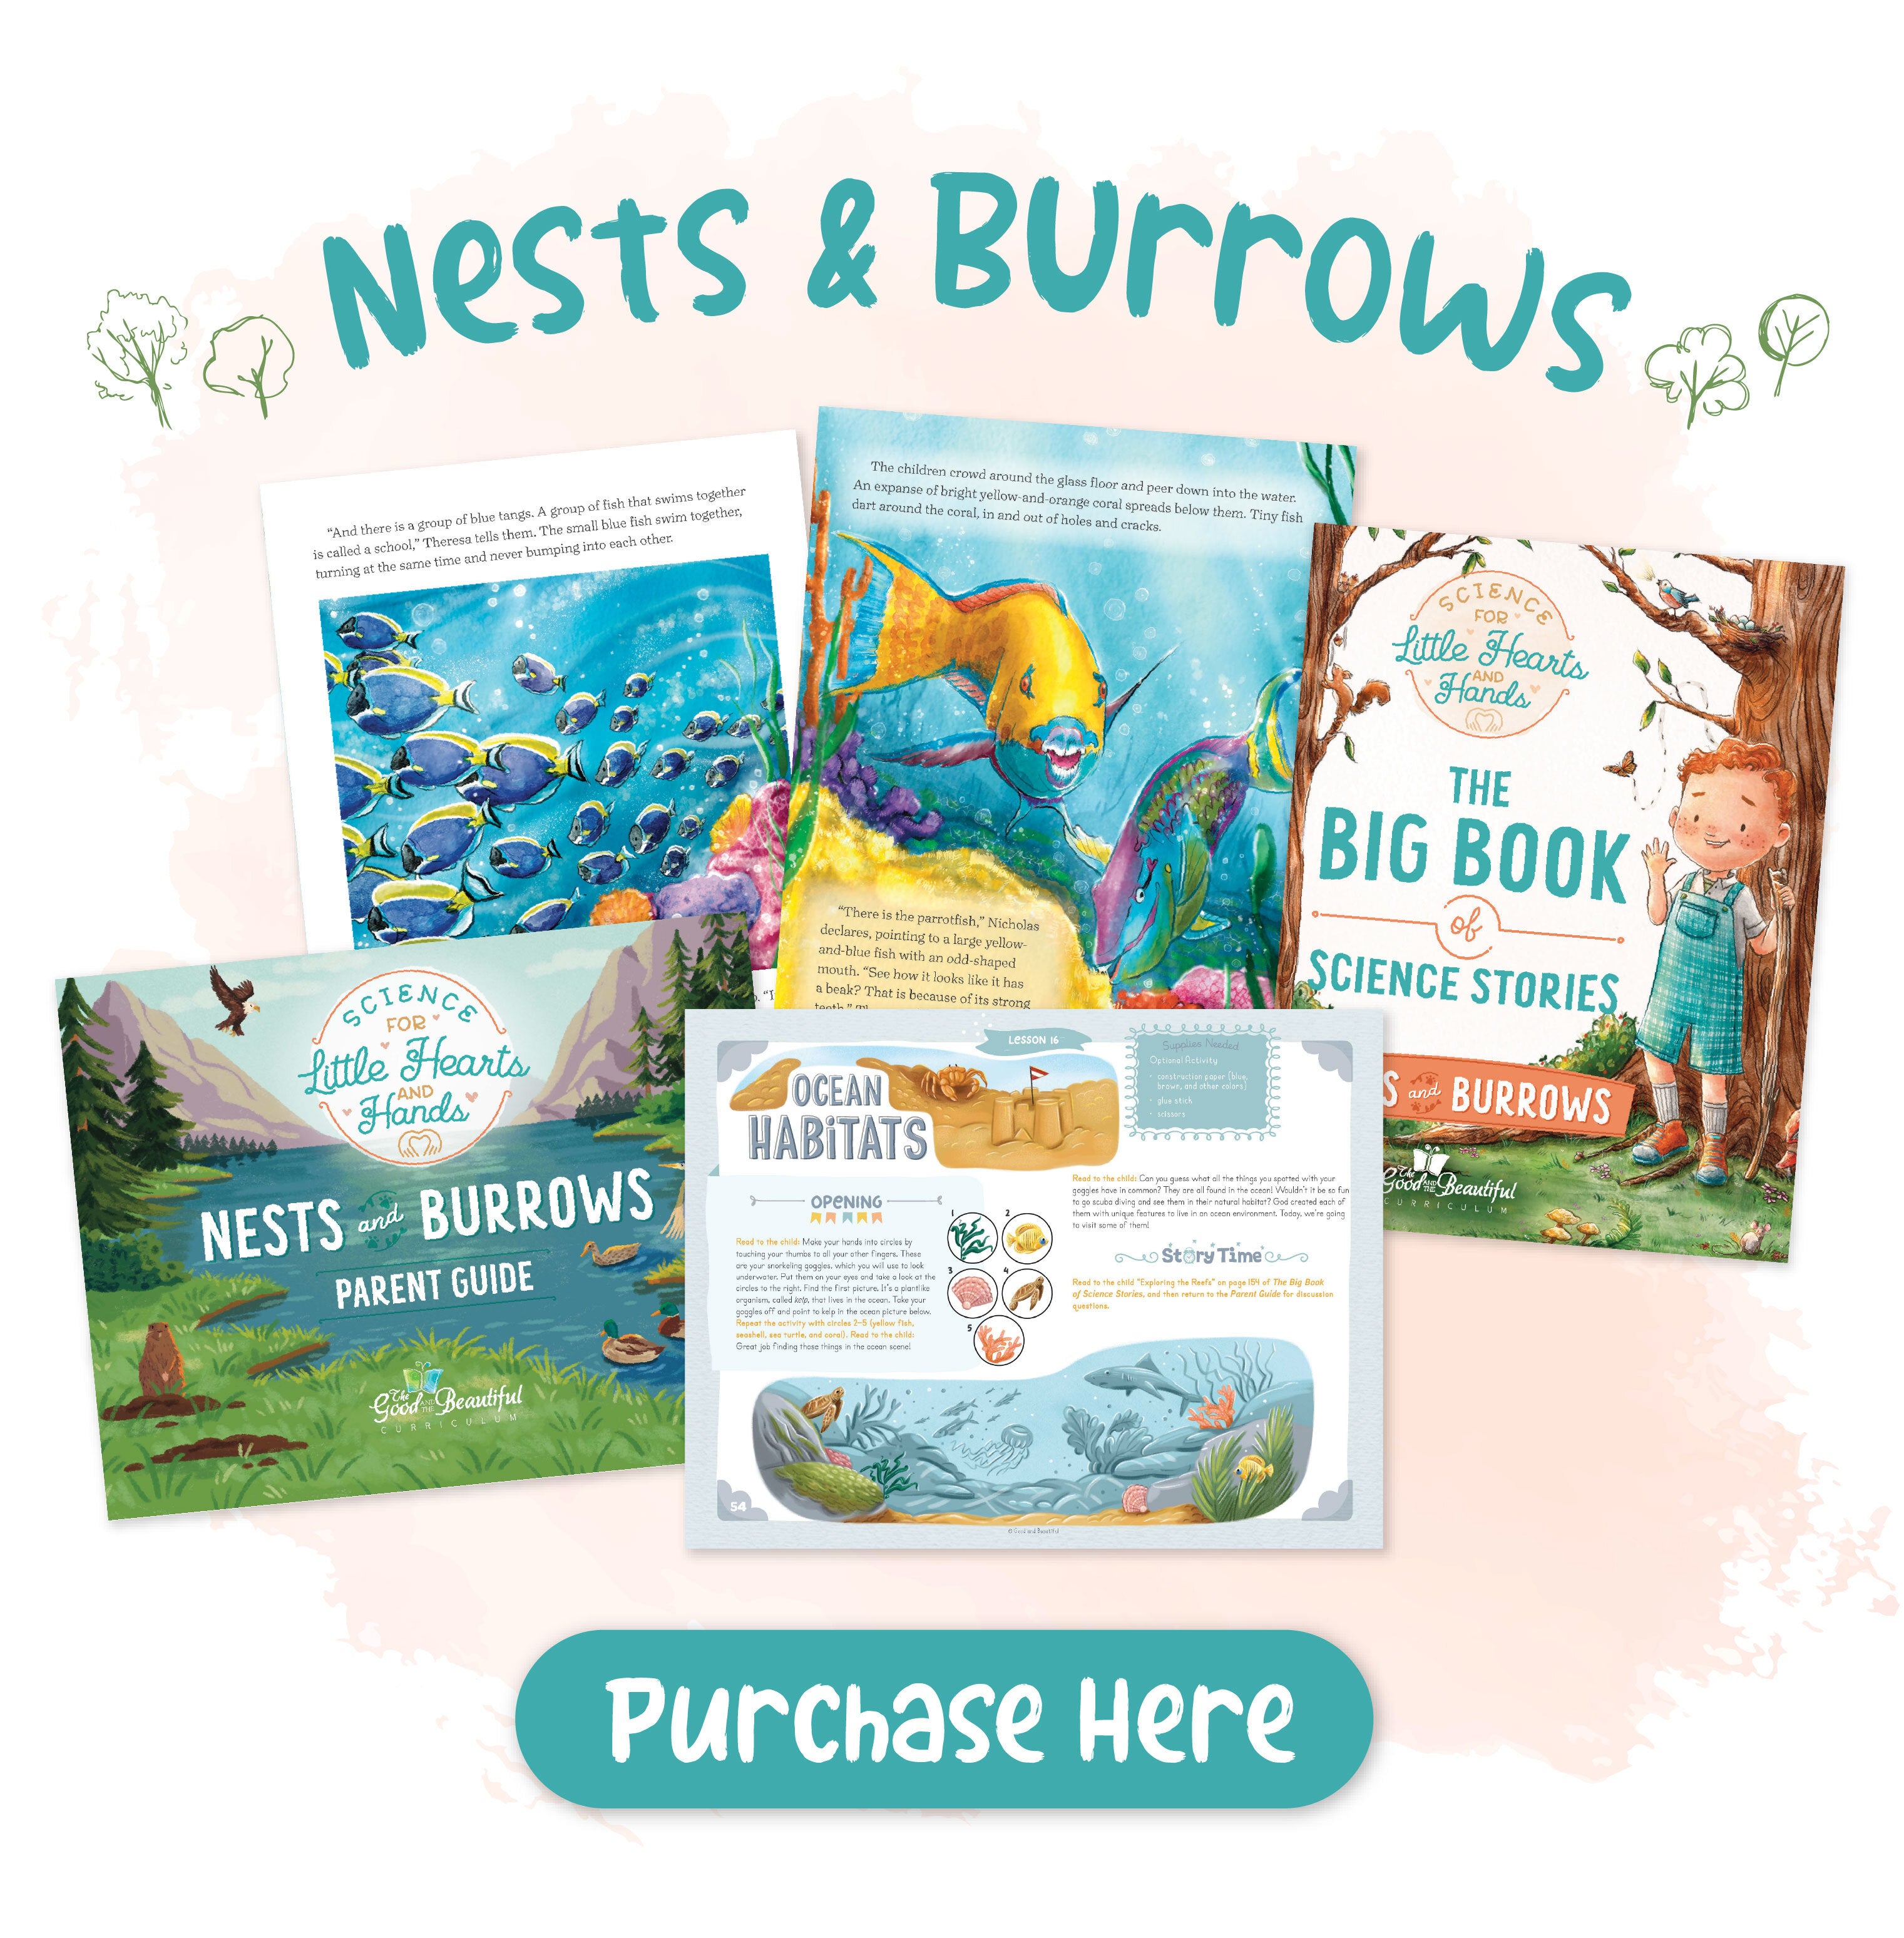
Introduce your youngest learners to the exciting, diverse world of animals that burrow, hunt, nest, fly, swim, and more in this thoughtfully designed course. Including engaging stories, hands-on activities, and interactive audio narrations, the fun and simple lessons inScience for Little Hearts and Hands: Nests and Burrowsare a gentle introduction to animals and their habitats for your children in preschool to second grade.


Yarn Bird Craft
Decorate one side of your bird and hang it on a wall, or decorate both sides and hang it from the ceiling.
Items needed to make a yarn bird craft:
- 3 sticks: two 2” sticks; one 4–6” stick
- Yarn (any color; use as many colors as desired)
- Colored paper scraps (wing, beak, eye)
- Cardboard (roughly 5″x7″)
- Scissors
- Glue or tape (A glue gun works well for this project.)
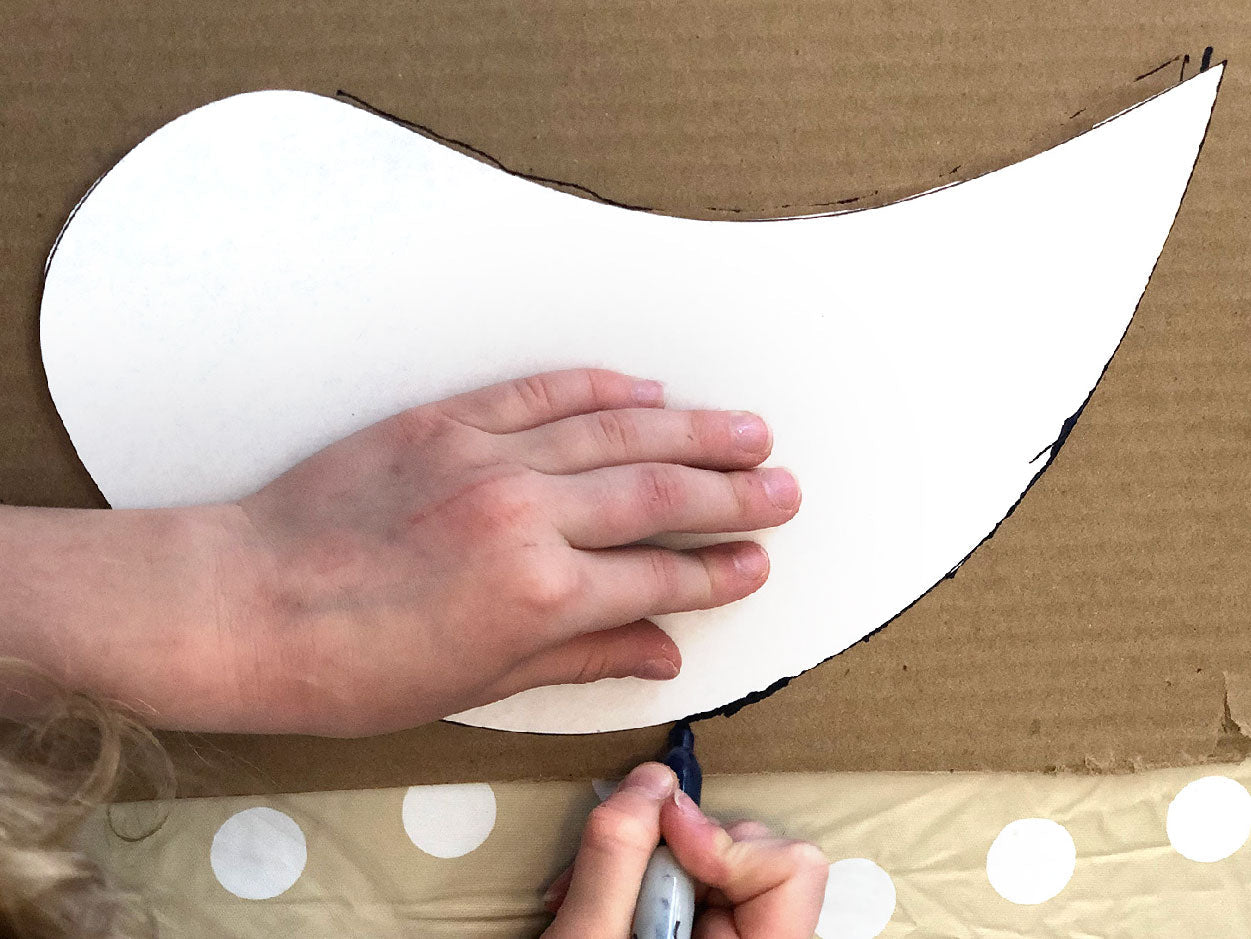
STEP 1:
Trace and cut out a bird shape from the cardboard. (This may be tricky for younger children. An older child or adult can cut it out ahead of time.)
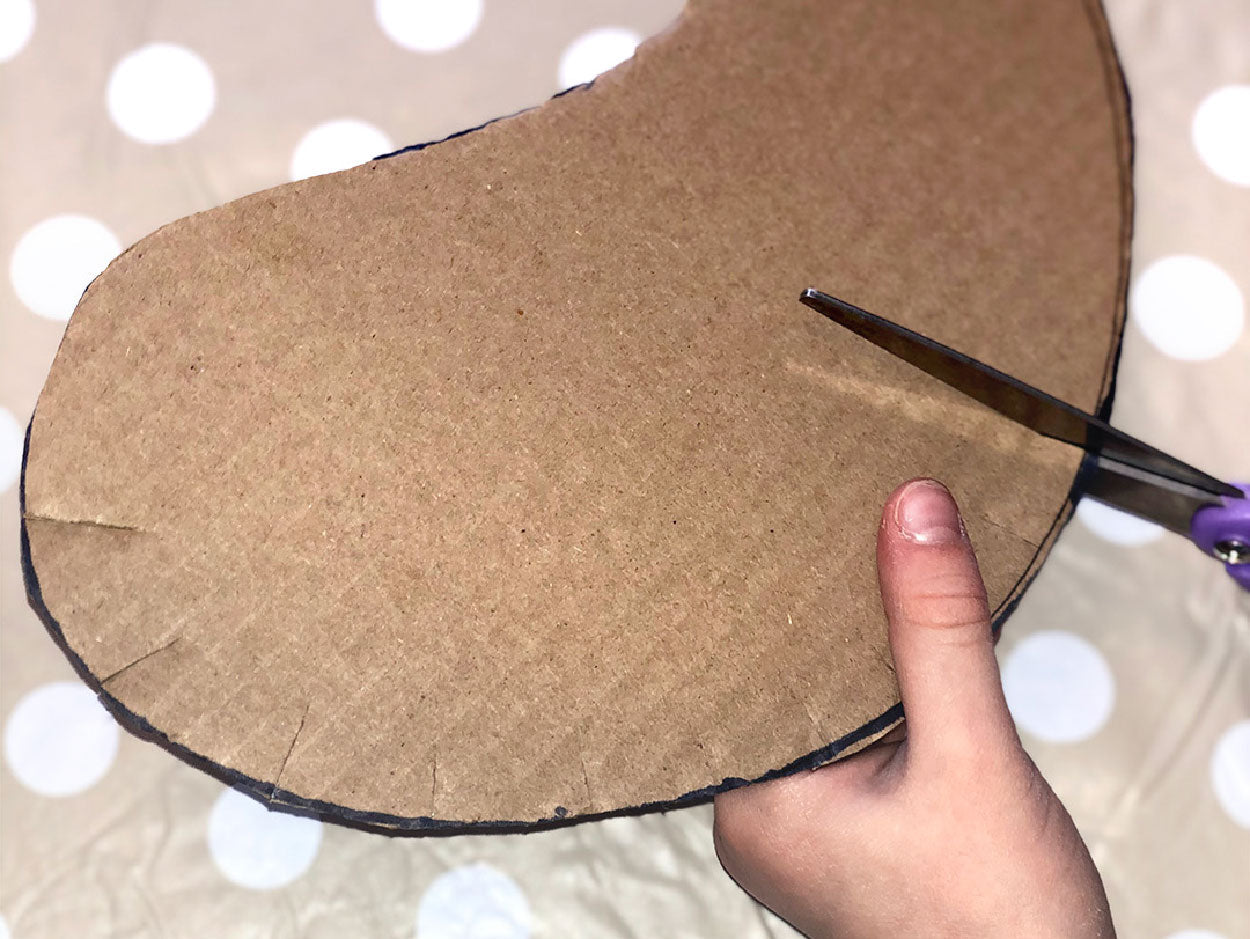
STEP 2:
Cut small slits along the edge of the bird body.
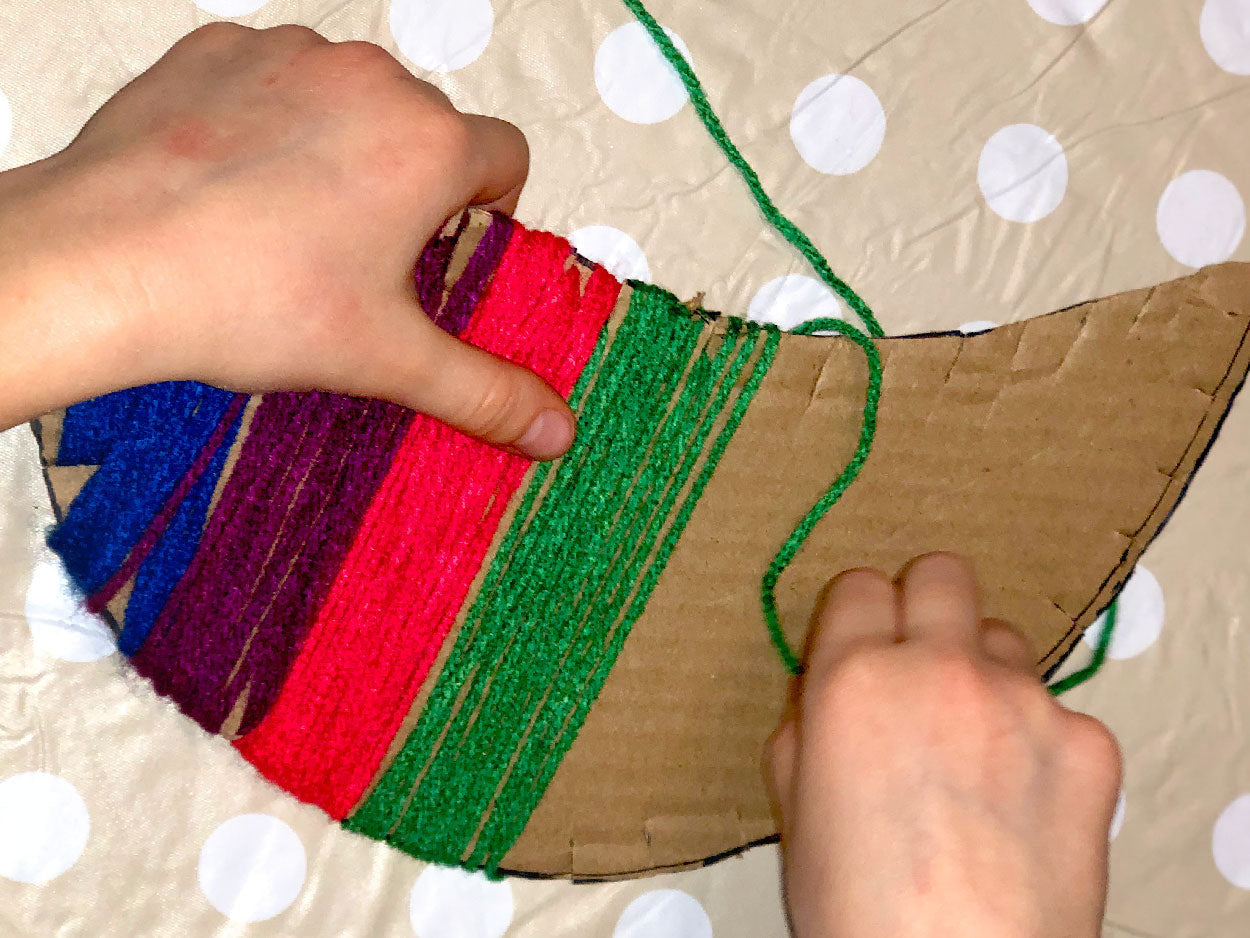
STEP 3:
Wrap the bird shape with yarn into the cut slits. To make your bird colorful, cut your yarn, tie a new color, and continue wrapping.
STEP 4:
Cut out scraps of paper for the eye, beak, and wing.
STEP 5:
Glue or tape the two 2” stick legs onto your bird.
STEP 6:
Finally, glue your bird onto a 4–6” stick.
-
Click Here for Free Download
Download a free PDF printable with a birdseed ornament recipe that is found in our Creative Arts and Crafts book, as well as instructions to make a yarn bird craft!
Other Bird Resourses
Swipe in mobile
Related Posts
-

Alternatives to Public School: Choosing the Bes...
Considering alternatives to public school? Explore homeschooling, charter schools, private schools, and other options for your family.
Alternatives to Public School: Choosing the Bes...
Considering alternatives to public school? Explore homeschooling, charter schools, private schools, and other options for your family.
Read more Alternatives to Public School: Choosing the Best Option for Your Child -
 2 comments
6 Fun Ways to Teach Kids About the World Cup
⚽ Wondering how to make the FIFA World Cup an unforgettable educational experience for your kids? Engage your children with this epic soccer tournament!
2 comments6 Fun Ways to Teach Kids About the World Cup
⚽ Wondering how to make the FIFA World Cup an unforgettable educational experience for your kids? Engage your children with this epic soccer tournament!
Read more 6 Fun Ways to Teach Kids About the World Cup -
 3 comments
How Dads Do Homeschool
Wondering how dads do homeschool? In this post we explore the many ways homeschool dads contribute to their children’s education and character.
3 commentsHow Dads Do Homeschool
Wondering how dads do homeschool? In this post we explore the many ways homeschool dads contribute to their children’s education and character.
Read more How Dads Do Homeschool -
 2 comments
Homeschool Requirements
One of the first questions many parents ask when they begin to consider homeschooling is this: What are my state’s homeschooling requirements? Learn about the requirements and where to find...
2 commentsHomeschool Requirements
One of the first questions many parents ask when they begin to consider homeschooling is this: What are my state’s homeschooling requirements? Learn about the requirements and where to find...
Read more Homeschool Requirements -

How Much Does Homeschooling Cost?
Many families are drawn to homeschooling for a variety of meaningful reasons. For some families, it offers a more personalized approach, allowing learning to grow around a child's individual pace,...
How Much Does Homeschooling Cost?
Many families are drawn to homeschooling for a variety of meaningful reasons. For some families, it offers a more personalized approach, allowing learning to grow around a child's individual pace,...
Read more How Much Does Homeschooling Cost? -

What Is a Subordinating Conjunction?
Find answers to frequently asked questions about subordinating conjunctions in this blog post. Learn about subordinating conjunctions and how they are different from coordinating conjunctions. Download a free list of...
What Is a Subordinating Conjunction?
Find answers to frequently asked questions about subordinating conjunctions in this blog post. Learn about subordinating conjunctions and how they are different from coordinating conjunctions. Download a free list of...
Read more What Is a Subordinating Conjunction? -

What Are Being Verbs?
Find answers to frequently asked questions about being verbs in this blog post. Learn about being verbs and how they are different from action verbs. Download a free list of...
What Are Being Verbs?
Find answers to frequently asked questions about being verbs in this blog post. Learn about being verbs and how they are different from action verbs. Download a free list of...
Read more What Are Being Verbs? -

What Are Prepositions?
Find answers to frequently asked questions about prepositions in this blog post. Learn about prepositions and how to answer your child’s grammar questions concerning prepositions. Download a free list of...
What Are Prepositions?
Find answers to frequently asked questions about prepositions in this blog post. Learn about prepositions and how to answer your child’s grammar questions concerning prepositions. Download a free list of...
Read more What Are Prepositions? -

Are Homeschoolers Too Sheltered?
Many parents struggle with the question of how much to shelter their children from the difficulties and trials in life. Homeschool families are no exception. Are homeschoolers too sheltered? Jenny...
Are Homeschoolers Too Sheltered?
Many parents struggle with the question of how much to shelter their children from the difficulties and trials in life. Homeschool families are no exception. Are homeschoolers too sheltered? Jenny...
Read more Are Homeschoolers Too Sheltered? -
 1 comment
Do Kids Really Need to Learn Cursive?
Is learning cursive really necessary? You might be surprised by Jenny’s answer. In this blog post and video, she shares some of the benefits of learning cursive and how The...
1 commentDo Kids Really Need to Learn Cursive?
Is learning cursive really necessary? You might be surprised by Jenny’s answer. In this blog post and video, she shares some of the benefits of learning cursive and how The...
Read more Do Kids Really Need to Learn Cursive? -
 47 comments
Months of the Year
Learning the months of the year is easy with this adorable "Months of the Year" song that takes children through the changing seasons. Keep reading for fun activities to do...
47 commentsMonths of the Year
Learning the months of the year is easy with this adorable "Months of the Year" song that takes children through the changing seasons. Keep reading for fun activities to do...
Read more Months of the Year -
 8 comments
Days of the Week
Learning the names of the days is easy with this simple Days of the Week song from The Good and the Beautiful. Find fun ways to practice putting the days...
8 commentsDays of the Week
Learning the names of the days is easy with this simple Days of the Week song from The Good and the Beautiful. Find fun ways to practice putting the days...
Read more Days of the Week -
 28 comments
Top 5 Tips for Homeschool Planning
Summer is the perfect time to plan ahead! In this blog post and short video, Jenny Phillips shares her top five tips for simple, yet effective planning for the next...
28 commentsTop 5 Tips for Homeschool Planning
Summer is the perfect time to plan ahead! In this blog post and short video, Jenny Phillips shares her top five tips for simple, yet effective planning for the next...
Read more Top 5 Tips for Homeschool Planning -

Tips for Managing Summer Screen Time
Looking for ways to manage your child’s screen time during the summer? Here are simple, practical tips to help reduce screen use, encourage creativity, and create a more joyful and...
Tips for Managing Summer Screen Time
Looking for ways to manage your child’s screen time during the summer? Here are simple, practical tips to help reduce screen use, encourage creativity, and create a more joyful and...
Read more Tips for Managing Summer Screen Time -
 3 comments
Tips for Limiting Screen Time
Technology brings a wealth of information to our fingertips, but overuse of screen time has become an issue for many families. Jenny Phillips shares her family’s journey to limiting screen...
3 commentsTips for Limiting Screen Time
Technology brings a wealth of information to our fingertips, but overuse of screen time has become an issue for many families. Jenny Phillips shares her family’s journey to limiting screen...
Read more Tips for Limiting Screen Time -
 11 comments
Homeschooling Year-Round vs Traditional
Is a traditional or year-round homeschool schedule best for your family? Watch this video from The Good and the Beautiful YouTube channel to find out some benefits and drawbacks of...
11 commentsHomeschooling Year-Round vs Traditional
Is a traditional or year-round homeschool schedule best for your family? Watch this video from The Good and the Beautiful YouTube channel to find out some benefits and drawbacks of...
Read more Homeschooling Year-Round vs Traditional -

Is Sentence Diagramming Necessary for Learning ...
Sentence diagramming can be a grammar exercise students either love or run from. Sit down with Jenny Phillips in this video and blog post as she discusses how and why...
Is Sentence Diagramming Necessary for Learning ...
Sentence diagramming can be a grammar exercise students either love or run from. Sit down with Jenny Phillips in this video and blog post as she discusses how and why...
Read more Is Sentence Diagramming Necessary for Learning Grammar? -

What Is a Solar Eclipse?
Witnessing a total solar eclipse is a once-in-a-lifetime experience for most. Learn all about total solar eclipses and how to safely view one. Then download directions for a fun solar...
What Is a Solar Eclipse?
Witnessing a total solar eclipse is a once-in-a-lifetime experience for most. Learn all about total solar eclipses and how to safely view one. Then download directions for a fun solar...
Read more What Is a Solar Eclipse? -
 2 comments
Is The Good and the Beautiful Math Rigorous?
Is The Good and the Beautiful Math Rigorous? What is rigor in mathematics, and is Simply Good and Beautiful Math rigorous enough? A rigorous homeschool math course teaches more than...
2 commentsIs The Good and the Beautiful Math Rigorous?
Is The Good and the Beautiful Math Rigorous? What is rigor in mathematics, and is Simply Good and Beautiful Math rigorous enough? A rigorous homeschool math course teaches more than...
Read more Is The Good and the Beautiful Math Rigorous? -
Count to 15
Teach children how to count to 15 through music and illustration with our delightful video on The Good and the Beautiful Kids Channel on YouTube. Then keep reading for more...
Count to 15
Teach children how to count to 15 through music and illustration with our delightful video on The Good and the Beautiful Kids Channel on YouTube. Then keep reading for more...
Read more Count to 15


